Pineapple Dangles - Juicy Fruit Earring Kit
- jamieandgarysmith1
- Apr 28, 2023
- 3 min read
Updated: Jul 13, 2023
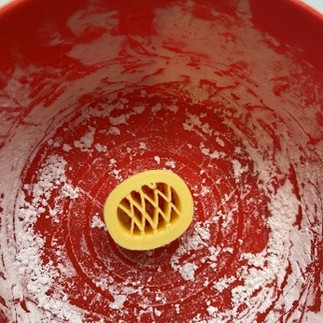
Ages 14+ - This kit requires the use of sharp objects, oven usage, small parts and cleaning products.

Included in kit:
· Sculpey ® Premo Polymer Clay
· Cutters – Large Peach, Strawberry Stud, Medium Pineapple, Lemon Stud
· 1 Baggy of Metallic Foil
· Wooden Roller
· Wooden Detail Stick
· Square of Parchment Paper
· Sanding & Buffing Block
· Jump Rings
· Earring hooks
· Stud Posts
· 6 Earring Cards
· 2 Pairs of Jewelry Pliers
Additional Supplies
This kit includes the supplies you will need to create beautiful jewelry. Here is a list of additional specialty items that you may want to know about.
● A Clay Blade, or thin metal blade for cleanly removing clay from your workspace. You may be able to use a utility knife blade.
● Krazy Glue for adhering posts (the stud process in these instructions does not require this)
● A ceramic tile. Some people find it easier to leave their creations on a tile to bake.
● Bake & Bond - A Sculpey ® product that adheres clay to clay. This helps if you plan on adding little clay embellishments to your designs.
● Hand Drill - Manual or small hand drills can efficiently and easily create holes for jump rings.
● Clay Depth Gauges or a Clay Press – This can help you easily and consistently control the thickness of your clay.
● Cornstarch – Used to prevent cutters with embossing from sticking in clay, or lifting clay pieces.
Please note that if you plan to expand the scope of your project, you may require additional materials.
Pineapple Dangles
1. You will need 1/4 block of White clay, and 1/4 of a block of Cadminum Yellow clay.
2. With clean hands mix colors thoroughly by kneading them together.
3. Ensure you clean all of your tools and your workspace well before and during your project. Red clay can easily stain your tools and all other colors of clay. Likewise, black clay can leave color on other clays and can make them look dirty.
4. Using a clean roller, roll out a piece of red clay approximately 2.5mm thick.
5. This Pineapple Cutter comes in two pieces and with the bottom piece being embossed with ridge details. To ensure it does not stick in your clay, and lift your piece off your surface, I recommend lightly dipping the cutter in a small amount of cornstarch prior to cutting your piece. If you do not have cornstarch, you can use water.
6. Use a clean, dry, soft brush to lightly dust away any and all cornstarch from your clay. If you used the water technique, you will need to lightly dry your clay with a lint-free cloth.
7. Roll the clay for the stem of your pineapple. For this, you will need ½ the block of your Wasabi Green Clay.
8. Cut 2 Stems from the green clay. When using clay cutters, you want to press firmly straight down with enough pressure to have the cutter meet the surface below the clay, but not damage the cutter. Once again, you may need cornstarch to ensure an easy release of the cutter.
9. Dust any cornstarch away and decorate the stems in any way you like.
10. For removing your clay from your workspace, you will need a sharp and thin blade. You can buy a clay blade for this, or your can use the blade of a utility knife. Use caution when using any sharp crafting supplies to avoid injury.
With your Pineapples removed from your workspace, you will want to lightly smooth the edges. This step significantly helps reduce the sanding needed in final stages.
11. Add finding holes to the center of the top of your pineapple bases. Then add holes to the center top and center bottom of your stems. These holes can be made using your detail stick, or with a pin or other fine pointed tool. The holes need to be wide enough to fit your jump ring through, but not too wide that they negatively effect the esthetic of your design. Once this is complete, gently smooth the edges of your clay pieces.
12. Place your pieces on a piece of parchment paper on a baking sheet. Bake at 275°F for 60 minutes.
13. Once done baking, and fully cooled. Sand/buff the edges of your pieces where needed.
14. Insert your jump rings. Attach a second jump ring to the first jump ring and your earring hook. This jump ring connects the first jump ring and the hook while also allowing the pieces hang in the correct direction.
15. Put your works of art onto a earring card, take a picture and tag @bougierougeboutique in your creations. They are now ready to gift or wear!


Comments