Creating Flowers From Scratch
- jamieandgarysmith1
- Jul 6, 2023
- 6 min read
Step #1 – Design

Plan your design out in a sketchbook or a piece of paper prior to starting your project.
This kit comes with the supplies to make the pictured jewelry on these instructions. However, with all crafts, you are only limited by your imagination and supplies. Please note, if you plan on changing these designs, you may require additional supplies.
Designing your earrings can be an adventure all on its own. Polymer clay artists find inspiration from nature to architecture and other art. When working with polymer clay, you want to get the most of each slab of clay you create. So, knowing how big you need to make a clay slab can help you both be efficient, create consistency within a collection, and reduce wasted clay.
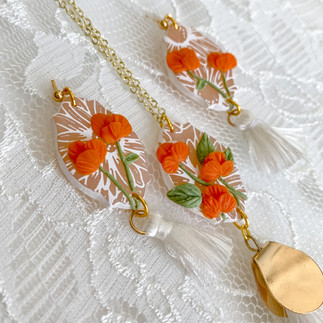
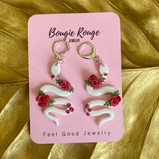
Below are some examples of florals added to jewelry pieces. These use a variety of techniques that will be covered below.
Step #2 - Clean
Always clean your workspace and tools with lukewarm soapy water, or a baby wipe prior to starting your project. Clay can be easily stained by other clays, paints or dyes. Similarly, lint or small particles can be pushed into your clay inadvertently from an unclean working space.
Take note that clay will not stick to your workspace if it is wet. So you will want to wash and dry your workspace and tools prior to beginning your project.
Step #3. Mixing and conditioning your clay
Conditioning Clay
For most clays, this is easy. Rolling your clay in balls or rope shapes will help “warm” your clay up. Some polymer clays or older clays can become quite firm and hard to condition. You can purchase a clay conditioner to help with this.
A note on clay stickiness. The more you handle your polymer clay, the softer and sticker it will become. This can be very useful when creating fine details. It can also pose problems with sticking to tools that are made of wood. If your clay sticks to your tools, let it stand for 10 minutes at a time. You may need to increase the standing times in hotter spaces, or where the clay has been handled a lot.
Mixing Colors
Sculpey® clay comes in beautiful colors. You may find the exact color you want in one of their pre-mixed blocks. If you are looking for a color more unique, seasonal, or are matching to another color, you may find that you need to mix different blocks of clay to achieve your desired color.
Color Mixing Rule: Always condition your white clay first. Wash your hands well before touching your white clay, and make sure it is in a clean place. Handle your colors from lightest to darkest. Ensure you clean your tools, hands and workspace between each color. Save black for your final color.
Step #3. Roll Out Your Clay & Cut Your Base Shapes
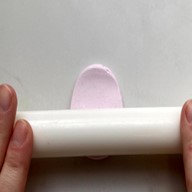
Using your roller, roll out the clay as pictured. Your clay should be smooth. If there are bumps in your clay, you may have unwanted particles or air bubbles in your clay. For air bubbles, fold and roll out your clay until the air bubbles are gone. For particles, ensure a clean workspace and remove each particle, then re-roll out.
Your base clay should be 2-2.5mm thick. Your details will be 1mm or less. Different pieces of jewelry require different thicknesses of clay. The base of a jewelry piece is normally the thickest part, while the details are often added using much thinner clay.
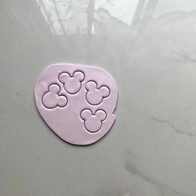
Once your clay is rolled out, you can add any extra designs you want. This could be using paint, liquid clay, sculpted details, foils, sparkles etc.. The options are endless. Always ensure that any additional detail you add is oven safe, and is properly secured to the clay. Non clay items may require a Bake and Bond product to adhere to the clay.
Pro Tip – Some earrings are symmetrical, and you can cut two of the exact same shape. Others are asymmetrical and require you to mirror the image if you want each earring to point towards your face.
Step #4. Add Your Leaves
4a. Leaves from scratch
No tools? No problem. You can make leaves easy enough using only a small detail stick or clay scalpel.
Roll small balls of clay. Elongate those balls into small tubes.
Next, using your scalpel or detail stick create a center vein and a point at the end of the leaf. The using the same tool, create angled veins from the center vein, upwards, towards the edge of the leaf.
4b. Creating Leaves from Cutters or Cut Outs
You can purchase small leaf cutters. Some come with embossed details, and some do not. If your cutter comes with embossed details, you simply need to cut out thin petals and apply them to your clay base (See step #6 for adhering your clay leaves and flowers)
4c. Creating Leaves From Cut Outs
If you don't have a clay cutter. You can free hand cut out small leaf shapes from your thin clay slab. You can then add the same center and side veins as described in 4a.
Pro Tip: When adding veins to your leaves, you can add them before you adhere your clay, or you can add them as part of the adhering process. If you are looking for a 2D affect, you can place your leaf on your clay base and then using your detail took, create veins and details while gentling pressing the two layers of clay together.
Step #5. Creating Flowers
5a. Creating Flowers with Folds
Roll small balls of clay, or cut small circles from your thin clay slab.
Next, using your scalpel or detail stick create small vertical indents in the petal. As you do this, you can carefully pull the clay vertically upwards to elongate your petal and create an asymmetrical petal. At the small end of the petal, carefully fold the last bit of the petal.
5c. Creating Flowers From Cutters & Molds
Cutters are a great way to create consistent flowers. Cutters can come in various sizes. You can also find petal only cutters, and flower and petal vein molds.
When using cutters, ensure your clay slab is thin. When you cut your petals or flowers, always clean your edges prior to applying them to your base clay piece. It will be very hard to clean up the edges once the flower is applied, and could damage your entire piece.
It is also a good idea to add any petal details to the freshly cut clay piece prior to putting the flower together.
When using clay molds, you want to ensure you your clay is soft and well conditioned. You also want to ensure your mold is clean. Add clay to the mold until the mold is full. If the mold has a lot of areas of small details, you will want to gently use a small dotting tool to ensure that the clay is pushed into each fold and flap. Once the mold is full, very carefully use a clay blade to remove any additional clay that is above the top of the mold. Be very careful to not cut the mold.
When removing the flower from the mold, you want to first gently press on all the sides of the mold, applying pressure to the clay. this will ensure that if they clay has stretched out the silicone of the mold, that the mold is pushed back into place and the clay is formed into the flower or petal as you intended. Next, you will want to carefully pull the opening of the mold open and apply pressure to the base of the mold popping the clay flower out.
When you flower is out of the mold, you can adhere it to the base clay piece and add additional details.
5d. Additional Flower Details
When you apply your florals to your base piece, you can add additional details in a variety of ways. Some of these are:
using a small dotting tool, you can open you petals more, bend them, or create additional space between petals.
Using Mica Powder you can add additional color to your petals.
If you have the space in your design, you can add gemstones or pearls in the center. These pieces must be well embedded into the clay to have longevity in wear.
#6 Adhering Your Clay Florals
Clays pieces can have trouble adhering due to a number of factors including:
Hard or unconditioned clay
Cornstarch, mica powder, water or another film being on one or both pieces
Cold clay
Using Mixed Medias
Here are a few ways to overcome these issues:
Use a Bake and Bond - applying a small amount of Bake and Bond will allow your two pieces of clay to adhere when baked. You will want to factor in that this may impact your ability to add details to your clay pieces as it can create some slip on your clay.
Ensure your clay and well conditioned.
Use a liquid clay to apply details or to adhere details. This is very much the same as Bake and Bond.
Use resin to attach details post baking.
#7. Add Holes for Findings
When designing your piece, you will want to plan where your finding holes need to be. It is best that they not be placed where you are applying your floral details; as, the movement of the jump ring can damage your florals.













Comments